
First router project. My family had a trivet like this when I was growing up, and I wanted to recreate it. Made from a scrap end of an oak board.

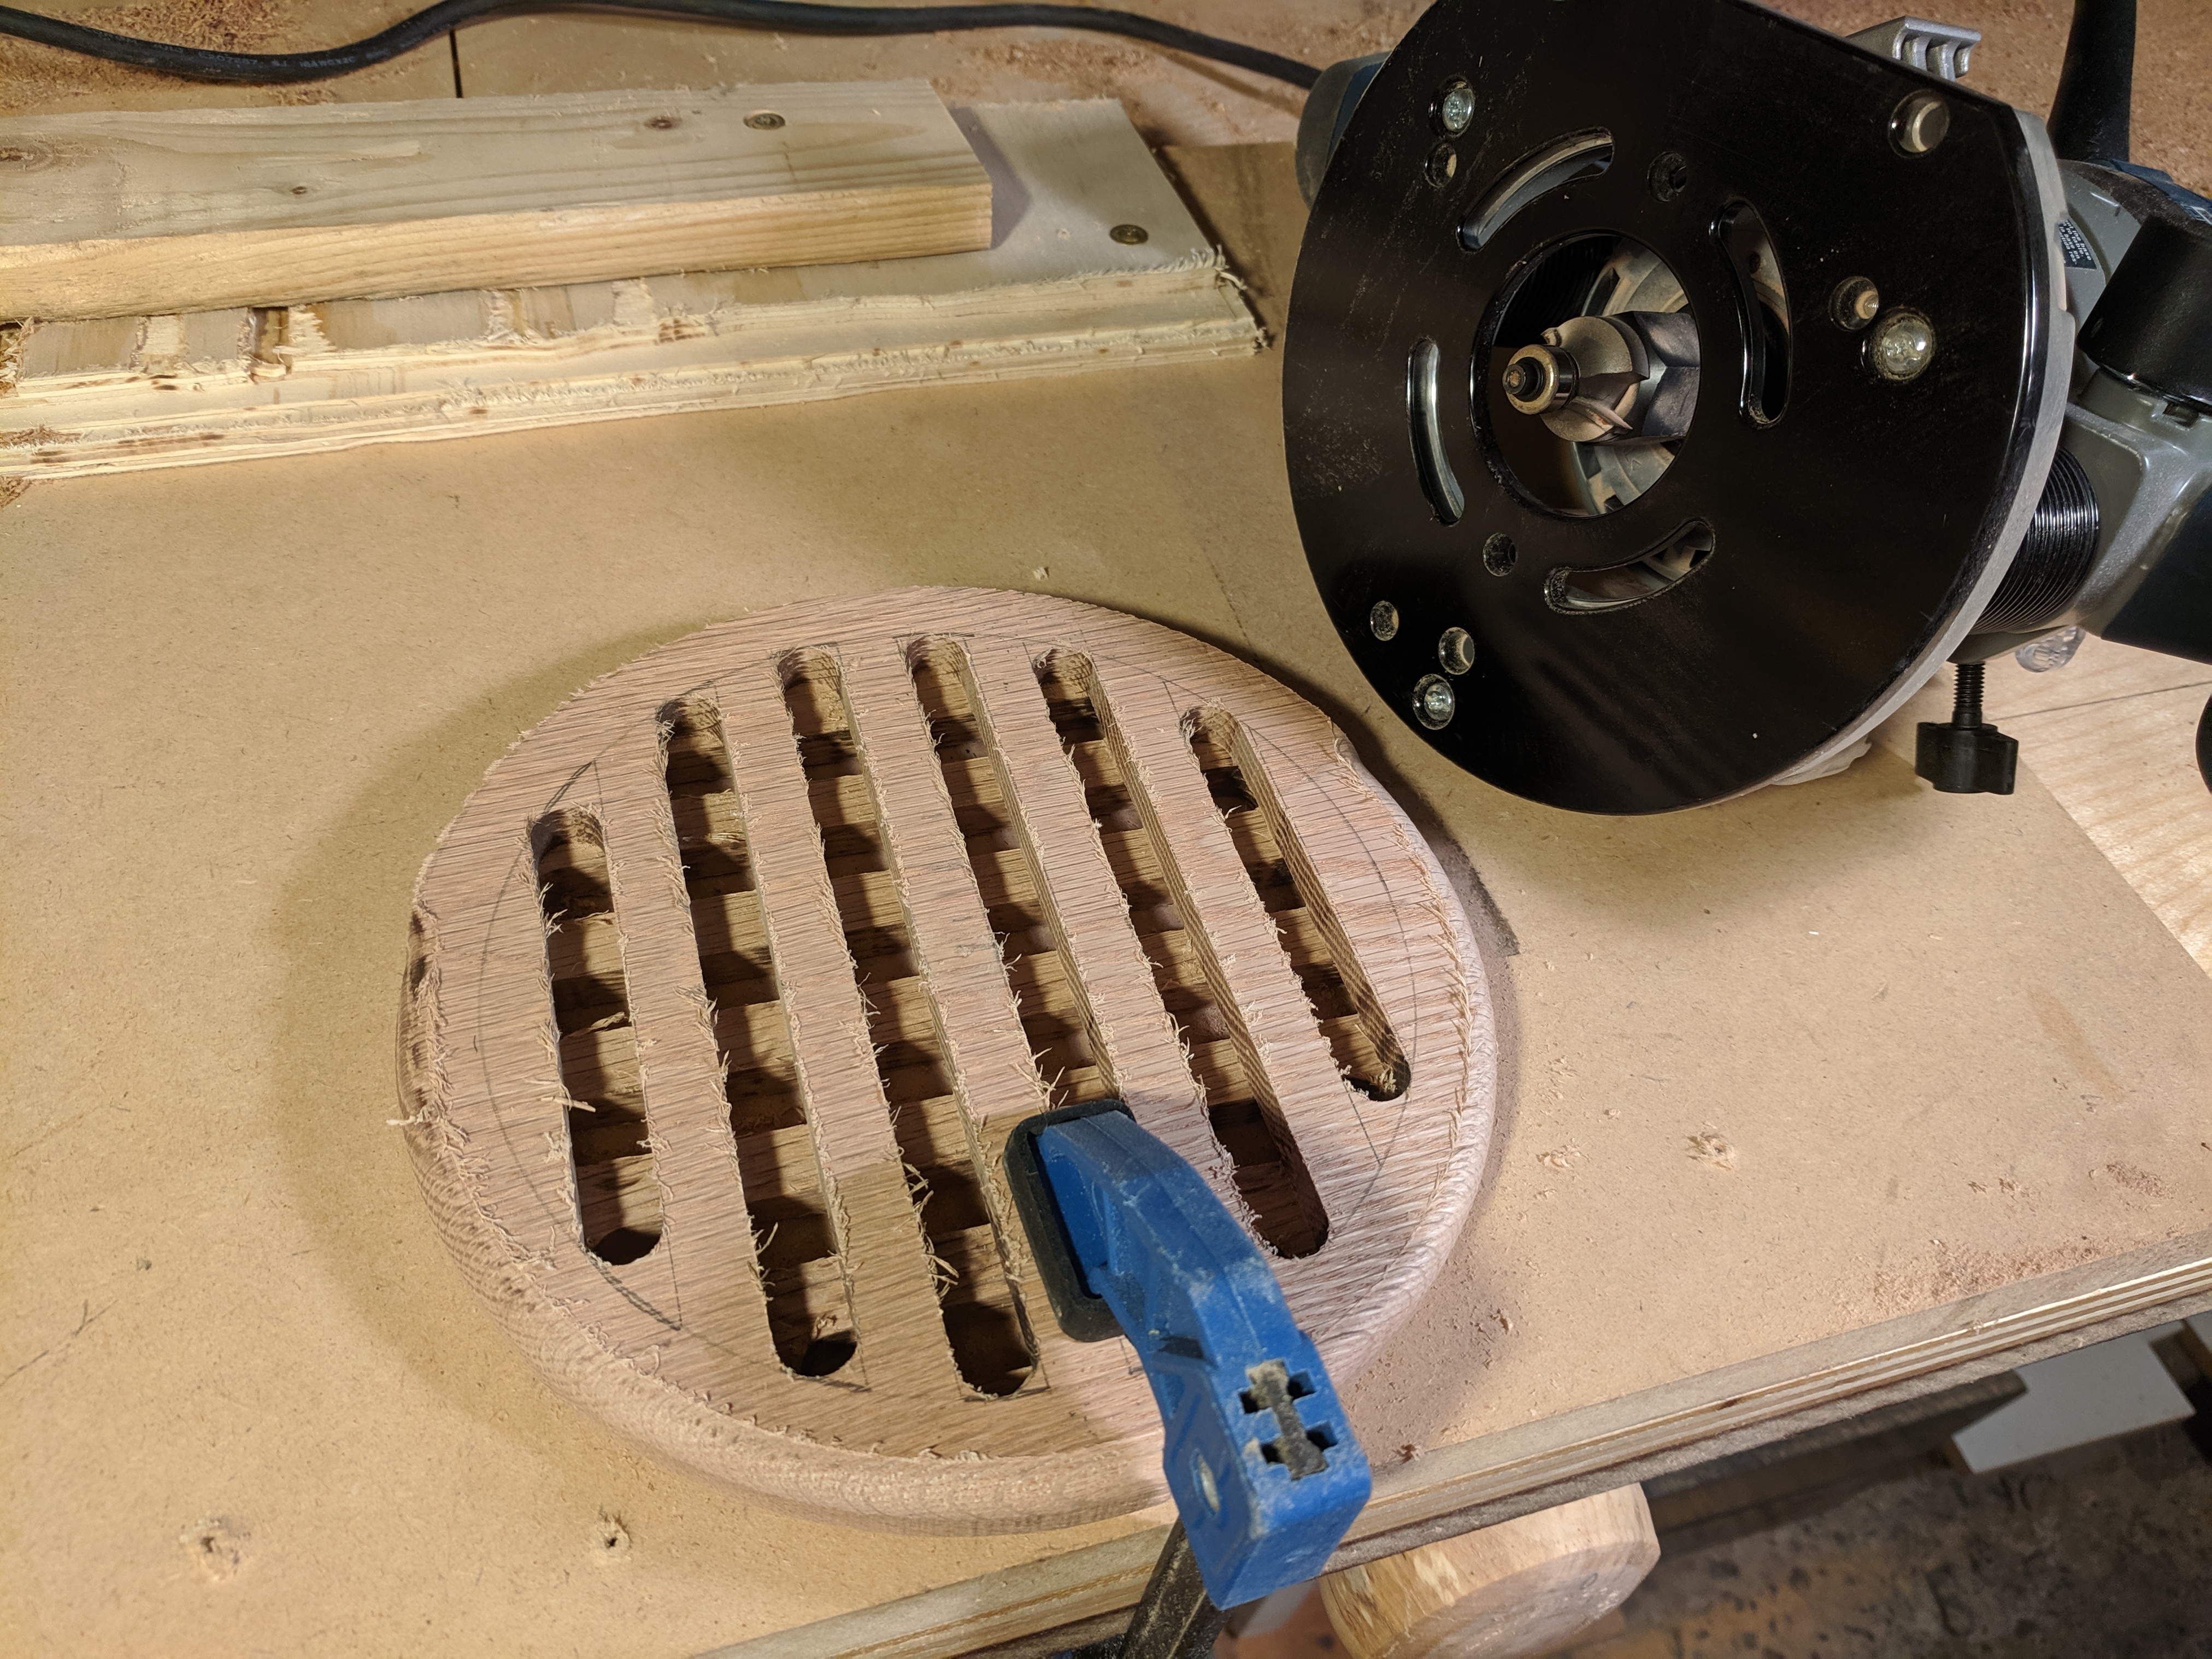
One of the channels on the bottom has a little deviation but otherwise they came out pretty much straight. And there’s a fair amount of burning on the sides. I was moving very slowly at full depth, so I wouldn’t have to try to get to the exact same endpoint multiple times at different depths. Curious if that’s a likely source of burn and what a better way would be; it’s not really a problem on the oak but would be on lighter wood (and I have an ash scrap waiting to be v2).
I started with a practice on a plywood scrap.
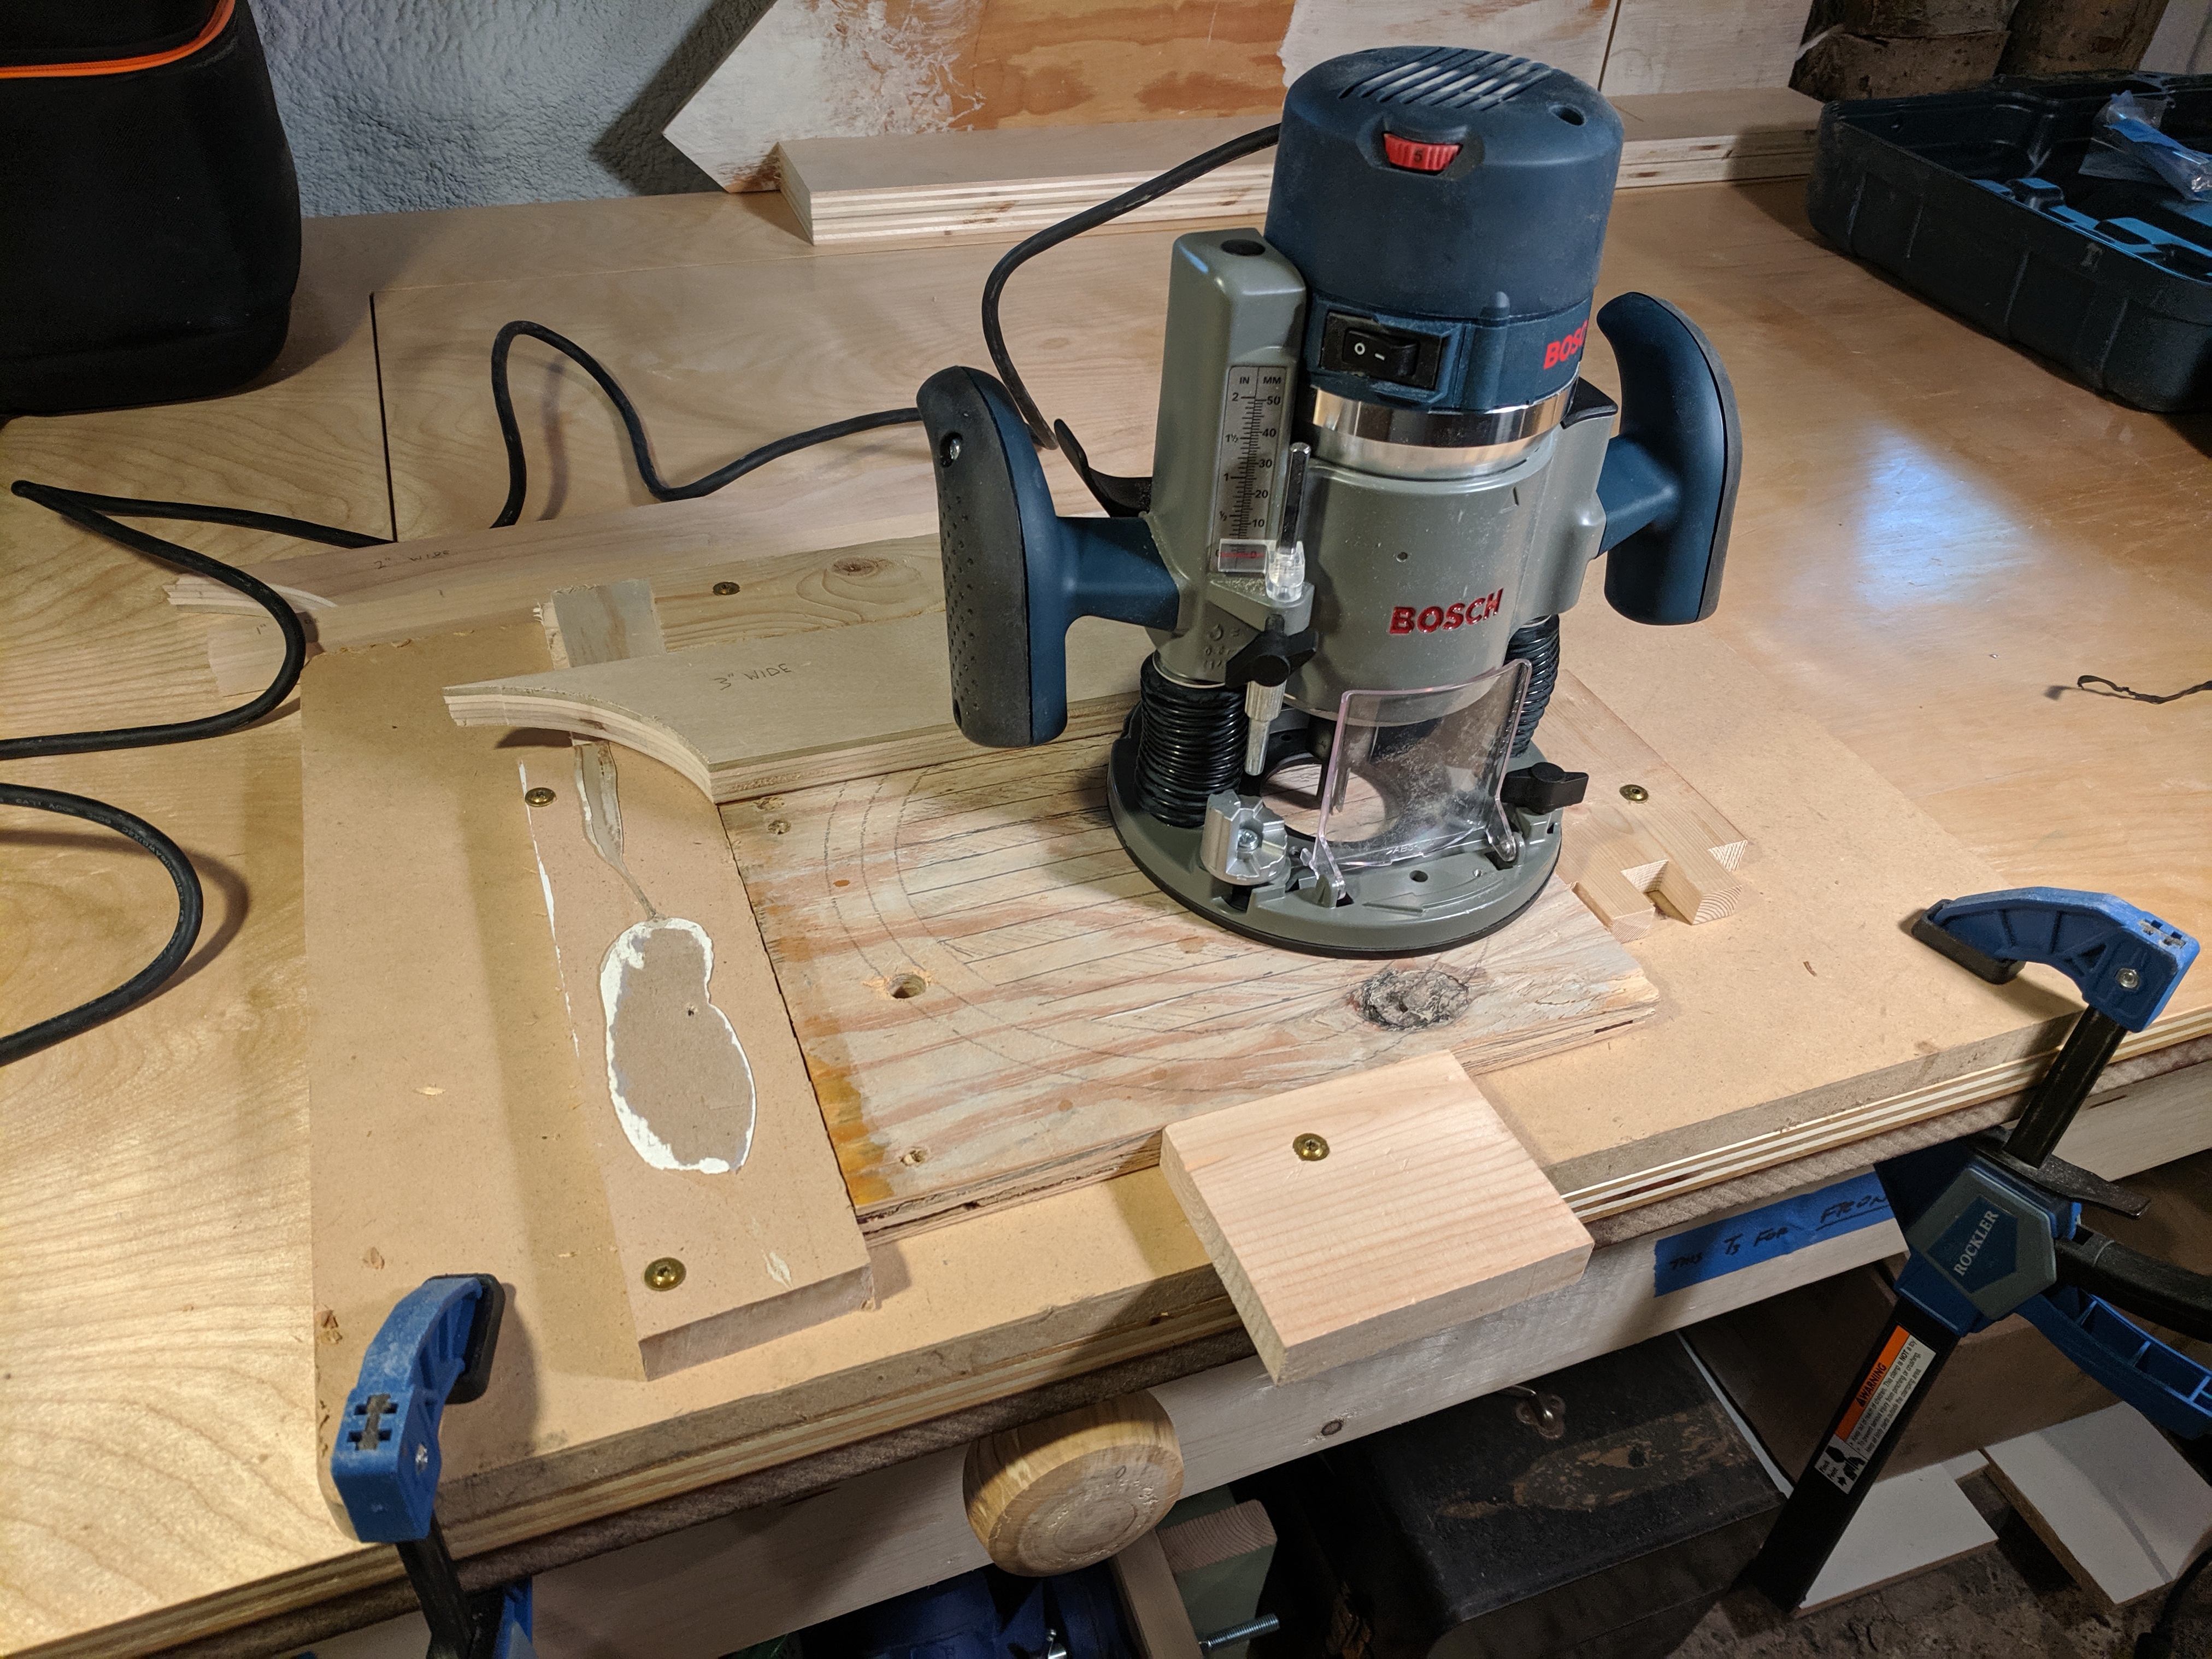
The jig mostly just holds it in place, with a fence along the back and 1", 2" and 3" spacers (then flip it around to work in from the other side).

For the real thing, I cut it out first on a bandsaw circle jig. That left a pinhole in the center, still slightly visible after a sawdust + glue patch, but it’s on the bottom. Placing a channel in the center could avoid that.

After all the criss-cross cuts (routes?) I used a 1/4" roundover. The set of the bandsaw left the outside a little rough, so I’d probably smooth that out before doing the roundover next time.
Finally, 80 + 150 + 200 with the orbital sander (just holding the trivet in my hand to do the edge and rounded corner), and butcher block finish.
Cooool. Now do one with opposing spirals!
Okay, now you’ve nerd sniped me. The only way I know how to do something like that would be with a CNC. Or very laboriously chase it out with chisels.
Casual DIY used a simple jig to make a cool pattern with overlapping curves, if not a spiral.
Fortress Fine Woodworking went full Spirograph. Maybe a less dense pattern like that on one side, and concentric circles on the other, would look cool?
In one of his videos on the Antikythera mechanism, Clickspring approximated a spiral as a series of offset circular arcs using a trammel and scorper. He makes soul achingly beautiful machining videos, go watch them.
I think I just invented a relatively simple router jig to lay out and cut a spiral/scroll. Imagine a circle cutting jig, but the router is held in a track. The pivot is anchored so it doesn’t turn, and the arm/track circles around it. The router is pulled in/pushed out by an acme screw that runs through the pivot, and the nut it rides in is turned by a bevel gear from the pivot. So as you push the router around its orbit, that action turns the lead screw. That should get you a constant rate spiral, and you could adjust the pitch by adjusting the ratio of the bevel gears.
Or do the “wind a string around a drum” technique but I don’t like the idea of doing that with a ROUTER.
Haha, yeah, it’s way beyond what could currently do - I have barely used a router. I was thinking you could trace the line for a spiral jig by having a a peg the right diameter in the middle, wrapping some non-stretchy string around it, and tying a pencil to it. But yeah, actually cutting it neatly would be a bitch. I guess a jigsaw and a lot of patience and clean up.
But yeah, probably way more suited to CNC :)
Just thought of another way to do it: A stationary pinion at the center driving a rack that moves the router along the arm. Which makes me wonder if that’s a marketable product, if I could patent that and sell it to Milescraft. They seem to love bullshit gimmicky router accessories.
Nicely done!
My folks still have one.
I wonder if these had some wave of popularity in the 70s or 80s.
That looks really good :)
The jig mostly just holds it in place, with a fence along the back and 1", 2" and 3" spacers (then flip it around to work in from the other side).
This is one of the things I love about communities like this - the tips you can learn from each other. I probably wouldn’t have thought to use spacers, and would have adjusted the jig instead, making less accurate cuts.
Thanks! I took some inspiration from [this video](https://youtu.be/AkUh_1EM6WU Simple jig for routed trivets.), though they were making square trivets.
I completely forgot we had one of these when I was a kid until seeing your post. Nice job.
To address the burning issue, generally speaking you want to increase feed rate, decrease spindle speed, and decrease depth of cut.
What I would do is set up stop blocks on your jig so that you can confidently put it against the stop, plunge in, plow a pass, hit the stop, plunge out, rotate the turret, repeat to final depth (2-3 passes for this operation). That way you don’t have to do the “careful…slowly…don’t overshoot…” thing.
I would also recommend an up-cut spiral flute bit with dust extraction.
Yup. This right here.
I was moving very slowly at full depth, so I wouldn’t have to try to get to the exact same endpoint multiple times at different depths.
This is the textbook source of burning on routed pieces, especially with a bit that’s anything less than pristine. As mentioned, stop blacks are the best solution. Barring that, plunging at the beginning and end, maybe twice, will give you cushion to stop without needing millimeter-accuracy, but hell, the best way to get those plunges in just the right spot is stop blocks. :-) As an added bonus, you’ll get less tearout doing multiple shallow passes. You sanded that down very nicely indeed, and the big open grain of red oak is actually quite good for masking that, but other materials might be less forgiving.
Forbidden burger patty
What’s a trivet
Pretty hot pad to protect the table from a pan/pot.
Lol I have one! And a square variant sitting on a shelf next to my dining room table.


